One of the most visible things you can use to set a custom rod apart from a factory rod is create your own custom grips. There are many, many materials and variations of those materials that, with a creative eye, you can mix, match and shape into something that is truly unique and beautiful. Add in just a pinch of science concerning the properties of your chosen materials, and you end up with a grip that is not only lovely, but a durable and sensitive interface between angler and rod.
I recently built a little 6’6″, 2 piece, 3 weight fly rod for a gentleman who had purchased from me before. Sadly, he suffered a devastating house fire, and lost that original rod, among many other more important things. After he told me his story and asked me to build him a replacement, I felt compelled to deliver something special as a nod to him overcoming his adversity. Among other little touches here and there on his rod, I decided to make him a custom cork and birch bark grip.
For the purposes of this blog, the first step is preparing and gluing the birch bark portion of the grip blank. (I could go back farther and discuss harvesting and other means of procuring birch bark, cutting usable circles out of the bark and so on, but that would take a while.) To create a grip section, one must stack the bark and glue it securely.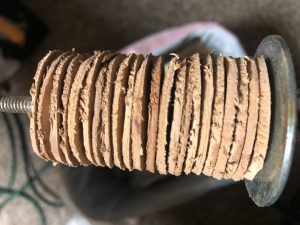
It varies with the thickness of your bark, but for this example it took about 22 separate birch bark rings to attain the 2 inches of grip length I needed. Birch bark is a layered, leathery material and to prepare it for glue, you must remove the outside “woody” layer of bark. On silver birch, (which I have found to be the best species to use in this application) The woody layer is white to dark gray and quite irregular.
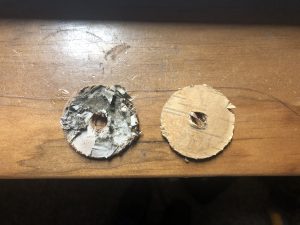 I remove this by splitting the outer layer off using a razor blade to get between this layer and the underlying bark and lifting (NEVER CUTTING!) the unneeded layer away. Underneath, the bark is tan in color and has a very leather-like texture.
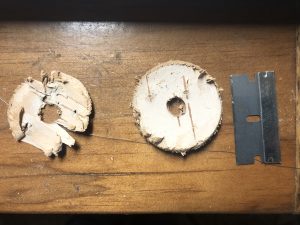 The side of the bark that faced the tree (see above) is usually rough, reddish and woody. This must be sanded smooth before gluing. Once these processes are completed for each ring, it’s time for some glue! I like Titebond III. It’s very effective, doesn’t leave a glue line if your surfaces are properly prepared, and its waterproof! I slide a prepared ring onto a piece of quarter inch thread rod, with a wing nut an fender washer in place. I apply glue to the face of the bark ring, and slide the next ring onto the glued ring, and repeat. Once all of the birch bark rings are in place on the all thread, I cap it off with another fender washer and tighten (and I mean TIGHTEN!) things down with another wing nut. The washers and nuts on the thread rod act as a clamp and built-in alignment tool.
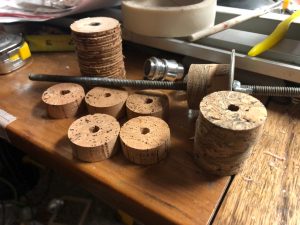
Whew! that’s the most tedious part of this type of handle done! Next, we turn our attention to the cork. On this grip, I used natural cork rings and “burl” cork rings. I buy my cork already in ring form. For a fly rod grip, I use 1 1/4 diameter, 1/2 inch deep cork ring with a 1/4 inch hole in the middle. The burl cork is actually a bunch of cork particles formed into a ring and held together with resin. It’s a great material, so long as you don’t use it on the ends of your grip. Because of it’s conglomerated nature, it can have a tendency to chip out if on the ends. Prep is pretty simple with cork. Simply sand both faces of the ring smooth and it’s ready!
Now we’re getting somewhere! The next step is to glue all of the cork and birch bark inlay into a grip blank! This is simply a matter of placing your ring, adding glue and adding the next ring onto your all thread “clamp”. Once again, I like Titebond III for this.
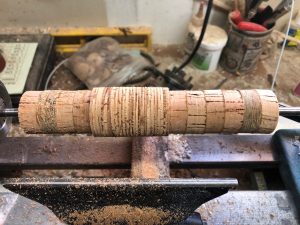
After things have dried for about 24 hours, the blank is ready to turn and shape on the lathe. I put my blank on a quarter inch mandrel, fasten onto the lathe with a collet chuck and support with my live center.
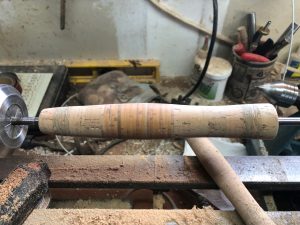
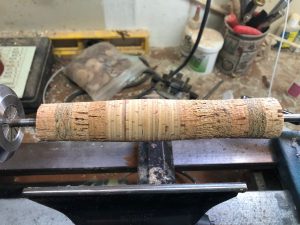 For getting things round, I use a Stanley “Sure Form” blade insert. This makes quick work of the glue squeeze out and getting the blank into a nice concentric cylinder. It’s also good for rough shaping the grip. Once I have things roughed out, I finish my shaping with 150 grit sand paper. I have to be really careful on 2 fronts here: 1. Sandpaper removers cork and other soft material very quickly. One can easily go too far and take off too much material. 2. The different materials in a composite grip sand at different rates. In this case, natural cork sands fastest, burl cork is in the middle and birch bark sands the slowest. So, for me to achieve a nice, flowing shape, I have to differentiate the time and pressure used on the 3 materials while sanding. Once final shaping is done with the 150 grit, I sand up through 320 grit to make the grip smooth.
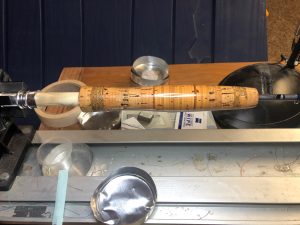
Woohoo! The hard part is over. Now all that’s left is finishing and fitting to the rod blank. For a cork and birch bark composite grip, I use Birchwood Casey Tru Oil. The oil pops the color of the birchbark and adds contrast between the natural and burl corks. Because this particular product also contains polymerizing compounds, it also protects all of the material and buffs to a lovely shine. I apply 4 to 5 coats, rub back with 0000 steel wool between coats, and buff as described here.
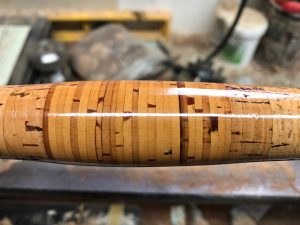
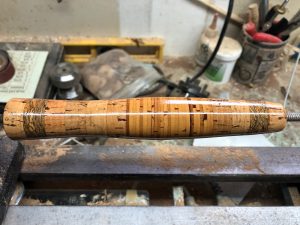
It’s a lot of work, but I find this type of grip to be truly beautiful and functional. I believe these grips are special, and my customers seem to be drawn to them when I have a rod sporting them on display. It is amazing how God has given us so many materials to craft with that reveal special and unexpected beauty if we learn to uncover it!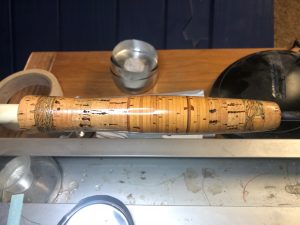
Menu
